

Layer Mask Clip Studio Paint
Layer Mask
Creates a mask for the selected layer or layer folder. Masks can be adjusted and deleted.
What is a layer mask?
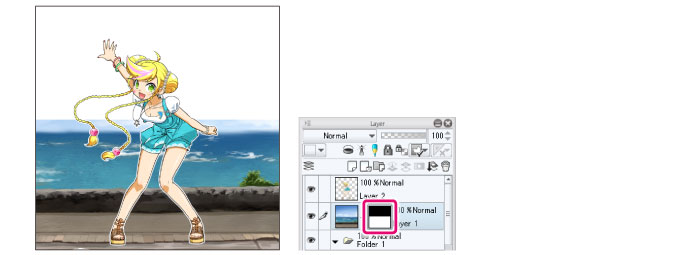
A layer mask is a feature that can hide part of the image on a layer. You can use this to hide unnecessary parts, or to limit the area for fill layers and gradient layers.
Editing a layer mask
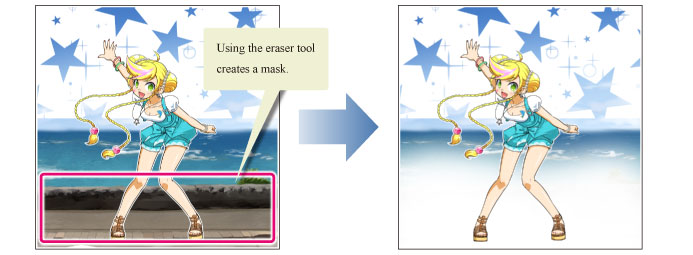
·You can draw on layer masks with a drawing tool to remove portions of the mask and reveal the images on the layers below.

·While selecting a layer mask, you can use eraser tools to draw more of the layer mask and hide the lower layers.
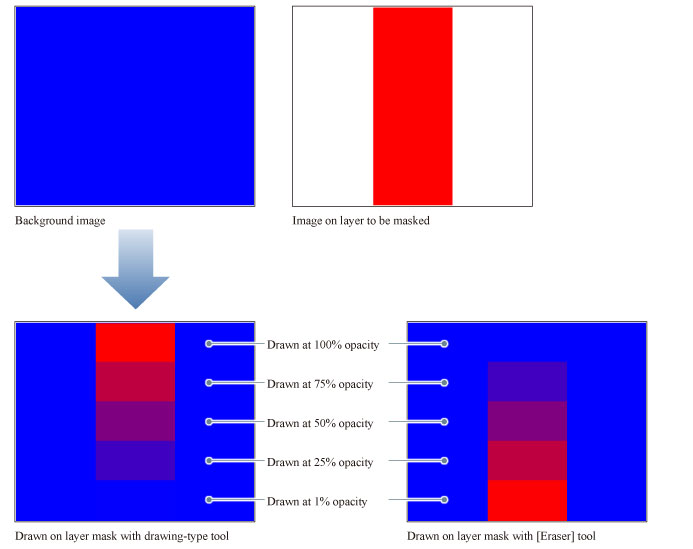
| You can also use brush or pen tools with transparency to draw the mask. |
·The opacity of the mask will vary depending on the opacity of the tool.
Mask Outside Selection
1 Using a selection tool, create a selection.
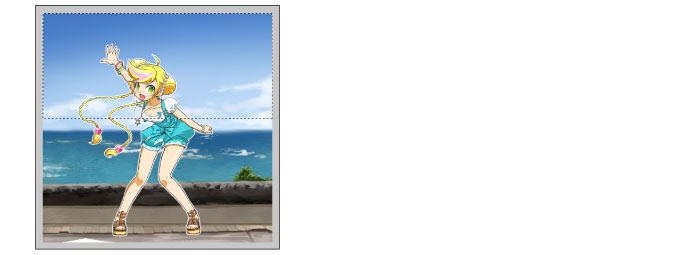
| If a selection is not created, the mask will apply to the entire layer. |
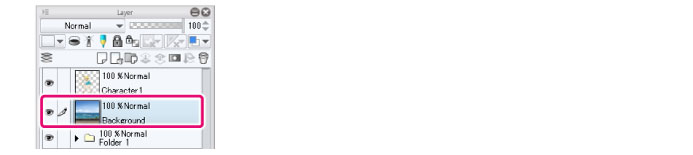
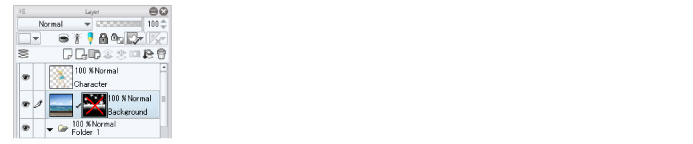
2 On the [Layer] palette, select the layer you want to mask.
3 Select the [Layer] menu > [Layer Mask] > [Mask Outside Selection].
The layer mask will be applied to the area outside the selection, and the layer mask will appear in the [Layer] palette Areas under the mask will be hidden.
| You can edit layer masks after creating them. For details, see "What is a layer mask? ". |
Mask Selection
1 Using a selection tool, create a selection.

| If there is no selection area, the layer mask will be created without any masked areas. |
2 On the [Layer] palette, select the layer you want to mask.

3 Select the [Layer] menu > [Layer Mask] > [Mask Selection].
The layer mask will be applied to the selected area, and the layer mask will appear in the [Layer] palette Areas under the mask will be hidden.
| You can edit layer masks after creating them. For details, see "What is a layer mask? ". |
Delete Mask
Select the [Layer] menu > [Layer Mask] > [Delete Mask] to delete the layer mask from the selected layer.
Apply Mask to Layer
Select the [Layer] menu > [Layer Mask] > [Apply Mask to Layer] to combine the layer and the layer mask together. This deletes the layer mask.
| ·When you combine the layer mask and the layer, the combined layer will be a raster layer, regardless of the original layer type. ·You can apply layer masks to layers with keyframes by selecting the [Animation] menu > [Edit layers with active keyframes]. |
Enable Mask
Select the [Layer] menu > [Layer Mask] > [Enable Mask] to enable or disable the layer mask.
Show Mask Area
Select the [Layer] menu > [Layer Mask] > [Show Mask Area] to display the mask area in purple.
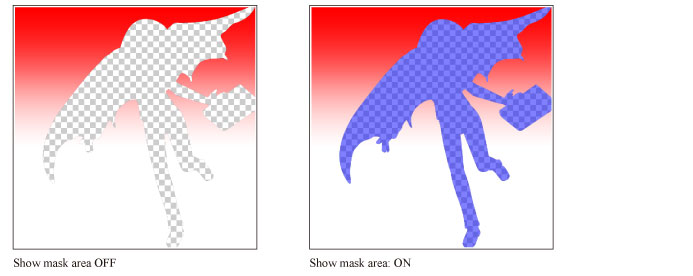
| You can also show/hide the masked area by clicking the layer mask icon while holding down Alt. |
Link Mask to Layer
Select the [Layer] menu > [Layer Mask] > [Link Mask to Layer] to link the layer and the mask. When linked, the mask moves with the layer when it is moved with the [Move layer] tool.
You can turn this off in the menu to unlink the mask and the layer. When not linked, the mask will not move when the layer is moved with the [Move layer] tool.
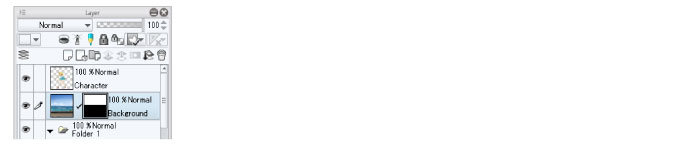
When a layer and a mask are linked, a check mark will appear between the layer and mask thumbnails on the [Layer] palette.
Layer Mask Clip Studio Paint
Source: https://www.clip-studio.com/site/gd_en/csp/userguide/csp_userguide/500_menu/500_menu_layer_mask.htm
Posted by: finksalict.blogspot.com
0 Response to "Layer Mask Clip Studio Paint"
Post a Comment